Tag: Things to do

January 29, 2013

DIY Pantry

Space-saving can storage next to refrigerator
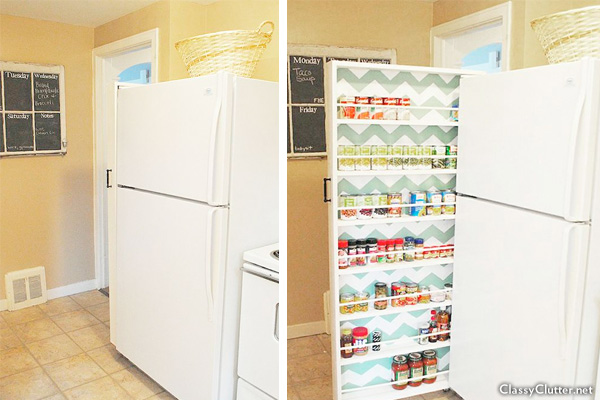
Mallory of Classy Clutter fit a rolling pantry in the 6-inch space between her refrigerator and wall. All images in this post: Classy Clutter

Finding hidden storage in the kitchen is always a treat. That’s why we’re sharing Classy Clutter’s rolling pantry, which gives slivers of space new purpose.

Mallory (half of the Classy Clutter team) built the portable pantry to fit the 6-inch space between her refrigerator and wall — a common underused place in many kitchens.

The neat thing about this project is that it’s adjustable. You can make it as big or small as you need. And it’s totally DIYable if you have basic skills with a drill, hammer, and screwdriver.

Here’s what else you’ll need:

  • Wood boards — Mallory used primed pine (about $15/ft. for 1-in. x 4-in.)
  • Dowels to hold cans in place ($1.50 for 1/2-in. by 4 ft.)
  • Sheet of beadboard (75 cents/sq. ft)
  • 4 casters ($3 each)
  • Handle or pull

Mallory has construction details, plus a handy diagram on her post about the project. Her rolling pantry was 64 inches high and 31.5 inches wide, and she only needed 7 shelves (9 were on the plan).

The other cool thing with this project is that you can jazz it up as much as you want. Mallory wanted the pantry to match her kitchen décor, so she spray-painted a blue-green chevron design on it, which made a really nice background for spices and soup cans.

Mallory says she got the idea on Pinterest. (We’ve been collecting other great ideas on our Perfect Pantry Projects page on Pinterest.)

Read more: http://www.houselogic.com/blog/kitchens/roll-out-pantry-small-kitchen/#ixzz2JL5ur95h

January 25, 2013

Unify Your Home in 8 Simple Design Areas

We tend to pay a lot of attention to the things that make our rooms unique, layered and interesting — and rightly so. But a home with nothing tying its spaces together can feel haphazard or even uncomfortable to be in. By making a few key choices about materials and finishes and applying them throughout your home, you can bring unity to your space.

Here are eight features to create continuity with, from the big areas (flooring and paint) to the tiniest details.

1. Hard flooring. If you are redoing floors or choosing flooring for a new home, a great choice to make early on in the design process is to go with the same treatment throughout the space. You can maintain a sense of continuity even with several different flooring materials as long as they make sense together. For instance, try using stone or tile floors in the entry and mudroom, and wood floors in the rest of the space.
2. Trim color. Sticking with a single color for trim, window frames, doors or all of the above is an easy way to unify your space. Painting just the inner frames of your windows black, as shown here, gives any room a very finished look, and repeating the treatment throughout the house is a subtle way to offer a sense of rhythm.
3. Hardware. Even something as small as a switch plate or drawer handle is worth your attention. Rather than picking out hardware at random as needed, make a conscious choice from the get-go and be consistent.
4. Window treatments. Choosing a single window treatment style for your home is one simple way to connect the rooms. Roman shades are a classic choice — they look good with any style decor, and they can be layered with curtains if you want to change things up.
5. Lighting. While statement pendants and colorful lampshades are fun and definitely have their place, you might want to keep some of your lighting constant. Try wall-mounted swing-arm lights over a seating area in the living room, flanking a bookcase and in the bedroom.
 6. A signature hue. Paint color can be a great unifier — or an interruption to flow. Encourage the eye to travel through rooms and give the entire space cohesion by picking paint colors in shades of the same hue or analogous hues.
7. Rugs. Natural-fiber rugs are a no-brainer for nearly any space, making them a great choice for providing consistency in the home. Use coir or sisal carpeting to cover a staircase and in the living room, halls and bedroom. Natural-colored carpeting, as shown here, is the classic choice, but black or espresso would be quite sophisticated.
8. A clean backdrop. This cottage feels spacious and serene, thanks in great part to fresh white wall paneling throughout. It’s one of the oldest tricks in the book, but an all-white space really can work wonders.
January 24, 2013

12 Simple Home Repair Jobs to Lift You Out of Winter’s Funk

Accomplishments — even little ones — go a long way toward a sunny outlook. Fortunately, there are plenty of easy, quick home repair chores you can do when you’re mired in the thick of winter. For max efficiency, make a to-do list ahead of time and shop for all the tools and supplies in one trip. On your work days, put the basics in a caddy and carry it from room to room, checking off completed tasks as you speed through them.

What to look (and listen) for

In each room, look around and take stock of what needs fixing or improving. Focus on small, quick-hit changes, not major redos. Here are some likely suspects:

1. Sagging towel rack or wobbly toilet tissue holder. Unscrew the fixture and look for the culprit. It’s probably a wimpy, push-in type plastic drywall anchor. Pull that out (or just poke it through the wall) and replace it with something more substantial. Toggle bolts are strongest, and threaded types such as E-Z Ancor are easy to install.

2. Squeaky door hinges. Eliminate squeaks by squirting a puff of powdered graphite ($2.50 for a 3-gram tube) alongside the pin where the hinge turns. If the door sticks, plane off a bit of the wood, then touch up the paint so the surgery isn’t noticeable.

3. Creaky floor boards. They’ll shush if you fasten them down better. Anti-squeak repair kits, such as Squeeeeek No More ($23), feature specially designed screws that are easy to conceal. A low-cost alternative: Dust a little talcum powder into the seam where floorboards meet — the talcum acts as a lubricant to quiet boards that rub against each other.

4. Rusty shutoff valves. Check under sinks and behind toilets for the shutoff valves on your water supply lines. These little-used valves may slowly rust in place over time, and might not work when you need them most. Keep them operating by putting a little machine oil or WD-40 on the handle shafts. Twist the handles back and forth to work the oil into the threads. If they won’t budge, give the oil a couple of hours to penetrate, and try again.

5. Blistered paint on shower ceilings. This area gets a lot of heat and moisture that stresses paint finishes. Scrape off old paint and recoat, using a high-quality exterior-grade paint. Also, be sure everyone uses the bathroom vent when showering to help get rid of excess moisture.

6. Loose handles or hinges on furniture, cabinets, and doors. You can probably fix these with a few quick turns of a screwdriver. But if a screw just spins in place, try making the hole fit the screw better by stuffing in a toothpick coated with glue, or switching to a larger screw.

Safety items

You know those routine safety checks you keep meaning to do but never have the time? Now’s the time.

7. Carbon monoxide and smoke detectors. If you don’t like waking up to the annoying chirp of smoke detector batteries as they wear down, do what many fire departments recommend and simply replace all of them at the same time once a year.

8. Ground-fault circuit interrupter (GFCI) outlets. You’re supposed to test them once a month, but who does? Now’s a great time. You’ll find them around potentially wet areas — building codes specify GFCI outlets in bathrooms, kitchens, and for outdoor receptacles. Make sure the device trips and resets correctly. If you find a faulty outlet, replace it or get an electrician to do it for $75 to $100.

9.  Exhaust filter for the kitchen stove. By washing it to remove grease, you’ll increase the efficiency of your exhaust vent; plus, if a kitchen stovetop fire breaks out, this will help keep the flames from spreading.

10. Clothes dryer vent. Pull the dryer out from the wall, disconnect the vent pipe, and vacuum lint out of the pipe and the place where it connects to the machine. Also, wipe lint off your exterior dryer vent so the flap opens and closes easily. (You’ll need to go outside for that, but it’s quick.) Remember that vents clogged with old dryer lint are a leading cause of house fires.

11. Drain hoses. Inspect your clothes washer, the dishwashers, and the icemaker. If you see any cracks or drips, replace the hose so you don’t come home to a flood one day.

12. Electrical cords. Replace any that are brittle, cracked, or have damaged plugs. If you’re using extension cords, see if you can eliminate them — for example, by replacing that too-short lamp cord with one that’s longer. If you don’t feel up to rewiring the lamp yourself, drop it off at a repair shop as you head out to shop for your repair materials. It might not be ready by the end of the day. But, hey, one half-done repair that you can’t check off is no big deal, right?

Read more: http://www.houselogic.com/home-advice/repair-tips/home-repair-jobs-winter/#ixzz2IZRy1A3Q

January 21, 2013

Whimsy Meets Function in This $50 Pantry Redo

The redesigned pantry from 11 Magnolia Lane
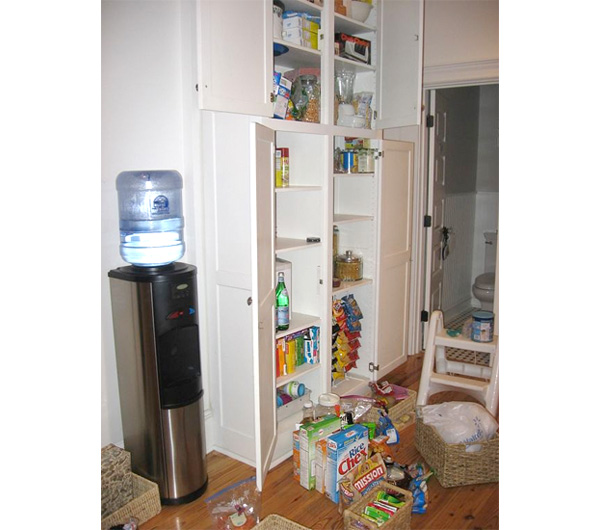
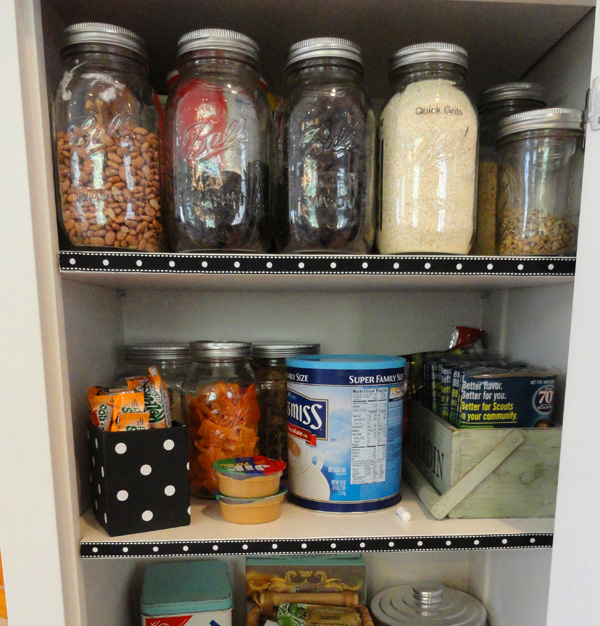
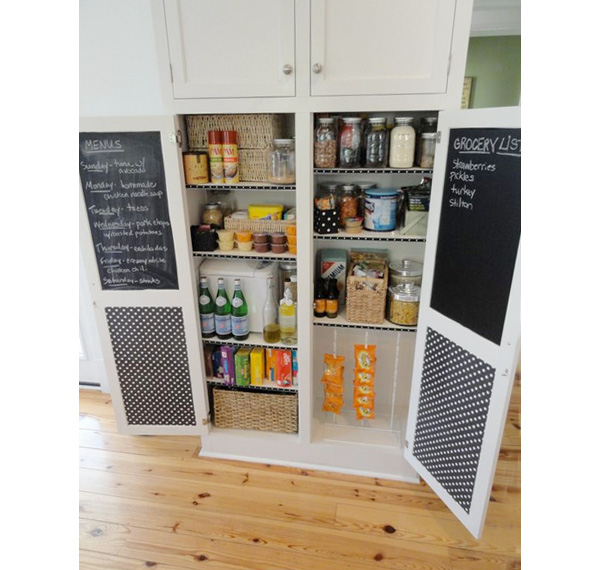
Since she moves often, Christy Black wanted her pantry to be functional, reversible, and whimsical. All images in this post: Christy at 11 Magnolia Lane

Our first pantry transformation comes from Christy Black, a military wife who moves every couple of years. It’s a mixed blessing that forces her to constantly edit her possessions and question each purchase with: Is this something I love, need, and want to unpack?

Frequent moves also guided the way the 11 Magnolia Lane blogger added kitchen storage by making over the pantry in the 1915 colonial revival her family recently called home. The pantry project had to be:

  • Reversible, for the next resident
  • Functional to accommodate her prized bread machine
  • Whimsical to provide little touches that makes each new rental feel like home

This is what Black’s “before” pantry looked like:

Pantry before

It was a two-door, built-in cabinet with adjustable shelves. The tallest items only halfway filled the tallest shelves (waste of space). Mounds of boxes and bags tumbled out when Black opened the doors.

“The pantry was the only storage I had for big boxes and small appliances, and nothing was deep enough or tall enough for them,” Black says. “And I hate things on the counters. I hate clutter.”

Pantry pare-down

Black started her pantry project by empting its contents onto floors and countertops.

Food on floor

Next, Black moved and removed shelves to customize the space to hold that bread machine and her favorite kitchen helper — a snacks rack her kids love and her friends covet. She snagged the rack on eBay, but you can buy one for about $37 online.

To corral half-filled pasta boxes and sloppy bags of beans, Black bought inexpensive glass canisters. She admits decanting everything into jars takes time, but jars look good, save space, and let her easily see what needs reordering. Of course, her glass canisters couldn’t hold a 25-pound of rice. So she stored bulk goods in the cellar, keeping the pantry for everyday items.

Pantry pizzazz

She glue-gunned a ½-inch wide, polka dot ribbon to the face of each shelf. If the next residents don’t like polka dots, she reasoned, they can easily remove the glue with a short blast from a hot hairdryer.

Polka dot ribbon

Black looked at the inside of the raised panel pantry doors and saw space that could answer her family’s perpetual question: What’s for dinner? She bought chalkboard contact paper ($7 for 18-in. by 6-ft. roll), and cut a panel for each door. On the left she wrote weekly menus; on the right she had a surface for her kids to doodle.

Chalkboard paint, which is easy to clean, would have worked better than paper, Black says. But paint isn’t reversible, which was a requirement for the pantry makeover.

Total cost: $50 (mostly for glass canisters)

Full height pantry

To see more inspiring pantry storage ideas, visit our Perfect Pantry Projects Pinterest page.

Read more: http://www.houselogic.com/blog/kitchens/design-pantry/#ixzz2IZSwbgmn

December 19, 2012

What You Need To Know About Home Appraisals

Understanding how appraisals work will help you achieve a quick and profitable refinance or sale. If you think the appraisal value of your home is too low, you can seek a second opinion.

When you refinance or sell your home, the lender will insist that you get an appraisal—an opinion of the value of your home based on what similar homes in your area have sold for in recent months. Here are five tips about the appraised value of your home.

1. An appraisal isn’t an exact science When appraisers evaluate a home’s value, they’re giving their best opinion based on how the home’s features stack up against those of similar homes recently sold nearby. One appraiser may factor in a recent sale, but another may consider that sale too long ago, or the home too different, or too far away to be a fair comparison. The result can be differences in the values two separate appraisers set for your home.

2. Appraisals have different purposes If the appraisal is being used by a lender giving a loan on the home, the appraised value will be the lower of market value (what it would sell for on the open market today) and the price you paid for the house if you recently bought it. An appraisal being used to figure out how much to insure your home for or to determine your property taxes may rely on other factors and arrive at different values. For example, though an appraisal for a home loan evaluates today’s market value, an appraisal for insurance purposes calculates what it would cost to rebuild your home at today’s building material and labor rates, which can result in two different numbers. Appraisals are also different from CMAs, or competitive market analyses. In a CMA, a real estate agent relies on market expertise to estimate how much your home will sell for in a specific time period. The price your home will sell for in 30 days may be different than the price your home will sell for in 120 days. Because real estate agents don’t follow the rules appraisers do, there can be variations between CMAs and appraisals on the same home.

3. An appraisal is a snapshot Home prices shift, and appraised values will shift with those market changes. Your home may be appraised at $150,000 today, but in two months when you refinance or list it for sale, the appraised value could be lower or higher depending on how your market has performed.

4. Appraisals don’t factor in your personal issues You may have a reason you must sell immediately, such as a job loss or transfer, which can affect the amount of money you’ll accept to complete the transaction in your time frame. An appraisal doesn’t consider those personal factors.

5. You can ask for a second opinion If your home appraisal comes back at a value you believe is too low, you can request that a second appraisal be performed by a different appraiser. You, or potential buyers, if they’ve requested the appraisal, will have to pay for the second appraisal. But it may be worth it to keep the sale from collapsing from a faulty appraisal. On the other hand, the appraisal may be accurate, and it may be a sign that you need to adjust your pricing or the size of the loan you’re refinancing.

Read more: http://buyandsell.houselogic.com/articles/what-you-must-know-home-appraisals/#ixzz2FRKX0D3V

December 18, 2012

7 Tips for Staging Your Home

Make your home warm and inviting to boost your home’s value and speed up the sale process. Warm, neutral-colored paint is key when staging your home

The first step to getting buyers to make an offer on your home is to impress them with its appearance so they begin to envision themselves living there. Here are seven tips for making your home look bigger, brighter, and more desirable.

1. Start with a clean slate Before you can worry about where to place furniture and which wall hanging should go where, each room in your home must be spotless. Do a thorough cleaning right down to the nitpicky details like wiping down light switch covers. Deep clean and deodorize carpets and window coverings.

2. Stow away your clutter It’s harder for buyers to picture themselves in your home when they’re looking at your family photos, collectibles, and knickknacks. Pack up all your personal decorations. However, don’t make spaces like mantles and coffee and end tables barren. Leave three items of varying heights on each surface, suggests Barb Schwarz of www.StagedHomes.com in Concord, Pa. For example, place a lamp, a small plant, and a book on an end table.

3. Scale back on your furniture When a room is packed with furniture, it looks smaller, which will make buyers think your home is less valuable than it is. Make sure buyers appreciate the size of each room by removing one or two pieces of furniture. If you have an eat-in dining area, using a small table and chair set makes the area seem bigger.

4. Rethink your furniture placement Highlight the flow of your rooms by arranging the furniture to guide buyers from one room to another. In each room, create a focal point on the farthest wall from the doorway and arrange the other pieces of furniture in a triangle around the focal point, advises Schwarz. In the bedroom, the bed should be the focal point. In the living room, it may be the fireplace, and your couch and sofa can form the triangle in front of it.

5. Add color to brighten your rooms Brush on a fresh coat of warm, neutral-color paint in each room. Ask your real estate agent for help choosing the right shade. Then accessorize. Adding a vibrant afghan, throw, or accent pillows for the couch will jazz up a muted living room, as will a healthy plant or a bright vase on your mantle. High-wattage bulbs in your light fixtures will also brighten up rooms and basements.

6. Set the scene. Lay logs in the fireplace, and set your dining room table with dishes and a centerpiece of fresh fruit or flowers. Create other vignettes throughout the home—such as a chess game in progress—to help buyers envision living there. Replace heavy curtains with sheer ones that let in more light. Make your bathrooms feel luxurious by adding a new shower curtain, towels, and fancy guest soaps (after you put all your personal toiletry items are out of sight). Judiciously add subtle potpourri, scented candles, or boil water with a bit of vanilla mixed in. If you have pets, clean bedding frequently and spray an odor remover before each showing.

7. Make the entrance grand Mow your lawn and trim your hedges, and turn on the sprinklers for 30 minutes before showings to make your lawn sparkle. If flowers or plants don’t surround your home’s entrance, add a pot of bright flowers. Top it all off by buying a new doormat and adding a seasonal wreath to your front door.

Read more: http://buyandsell.houselogic.com/articles/7-tips-staging-your-home/#ixzz2FRIwWBUt

December 12, 2012

8 Super-Secret Hiding Places for Holiday Presents

Christmas presents stored in the trunk
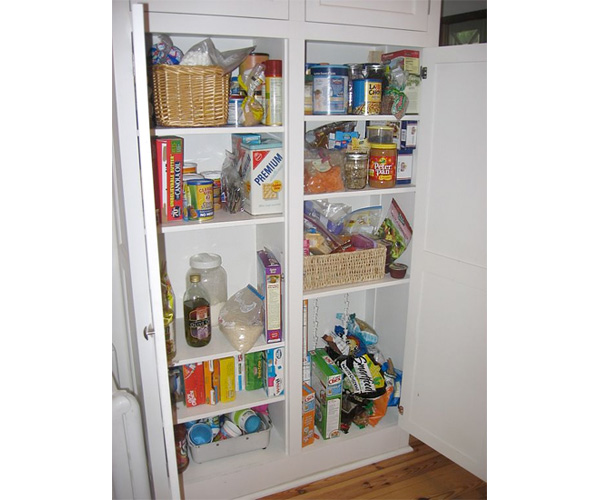
If your children snoop for presents, consider hiding gifts in the trunk of your car — kids will never think to look there.

Whether you’ve got a nosy spouse or a curious kid, you need a good hiding place to squirrel away those gifts until you find time to get them wrapped and under the tree. Here are some ideas we came up with:

1. Borrow a friend’s house. Swap storage spaces with a trusted friend or neighbor, and you won’t spoil any surprises. This is particularly useful if you’re buying someone a big present, like a bicycle or a car — you might talk a neighbor into letting you borrow space in their garage until Christmas morning.

2. Pop the trunk. This won’t work if you have an SUV or hatchback, but if you’ve got a car with a trunk that’s closed off from the backseat, it’s a primo place to hide gifts. Small children will never get in there.

3. Make your office work for you. If your office is a safe, secure place, squirrel some presents there. This is only an option if you work out of your home, though — home offices are prime targets for prying eyes.

4. Take stock of kitchen pots. Got a huge stock pot? Unless you’re planning to make a giant vat of soup anytime soon, the stock pot can hold a load of small gifts, and chances are your family will never think to look there.

5. Make use of your underwear drawer. Small presents can easily fit there. Your spouse probably won’t hesitate to look there, but your kids might stop short of rifling through your skivvies. (We hope.)

6. Crack the crawl space. If you don’t mind a little dirt and some creepy-crawlies, the crawl space can hold some sizable presents. Don’t store anything there for too long, though — unless your crawl space is insulated. Moisture and temperature changes could damage items. Plastic toys are OK to keep outside; electronics should be stored inside.

7. Rent a storage space. If you’ve got a ton of presents to hide, you’ll need to look outside your house. Some storage units offer one-month-minimum specials for as low as $25. Check the storage units in your area for deals.

8. Go for the cleaning supply closet. Worst-case scenario: Your kids might find presents there, but they’d also find the cleaning supplies, which means they might actually clean something. Now that would be a Christmas miracle.

Where do you hide holiday presents?

December 10, 2012

Toys For Tots

Please continue to support our efforts with Toys For Tots. Today is the last day to drop off new, unwrapped toys at our offices at 8945 Highway 19 N in Zebulon. Thank you for your support!


December 7, 2012

Do Something Good for You

During the holiday season, it is so easy to get stressed. Be sure to take a few moments each day to do something nice for yourself. Below are some ideas of what you can do.

* Manicure / pedicure

* Read a book

* Have a quite time

* Rearrange your bedroom

* Paint something

* Take a nice warm bath

* Go for a walk

* Listen to some music (Be sure to stay away from Christmas music if you find that it’s having the opposite effect on you.)